How to Use
Open the Import Dialog
You can open the import dialog from the content browser.
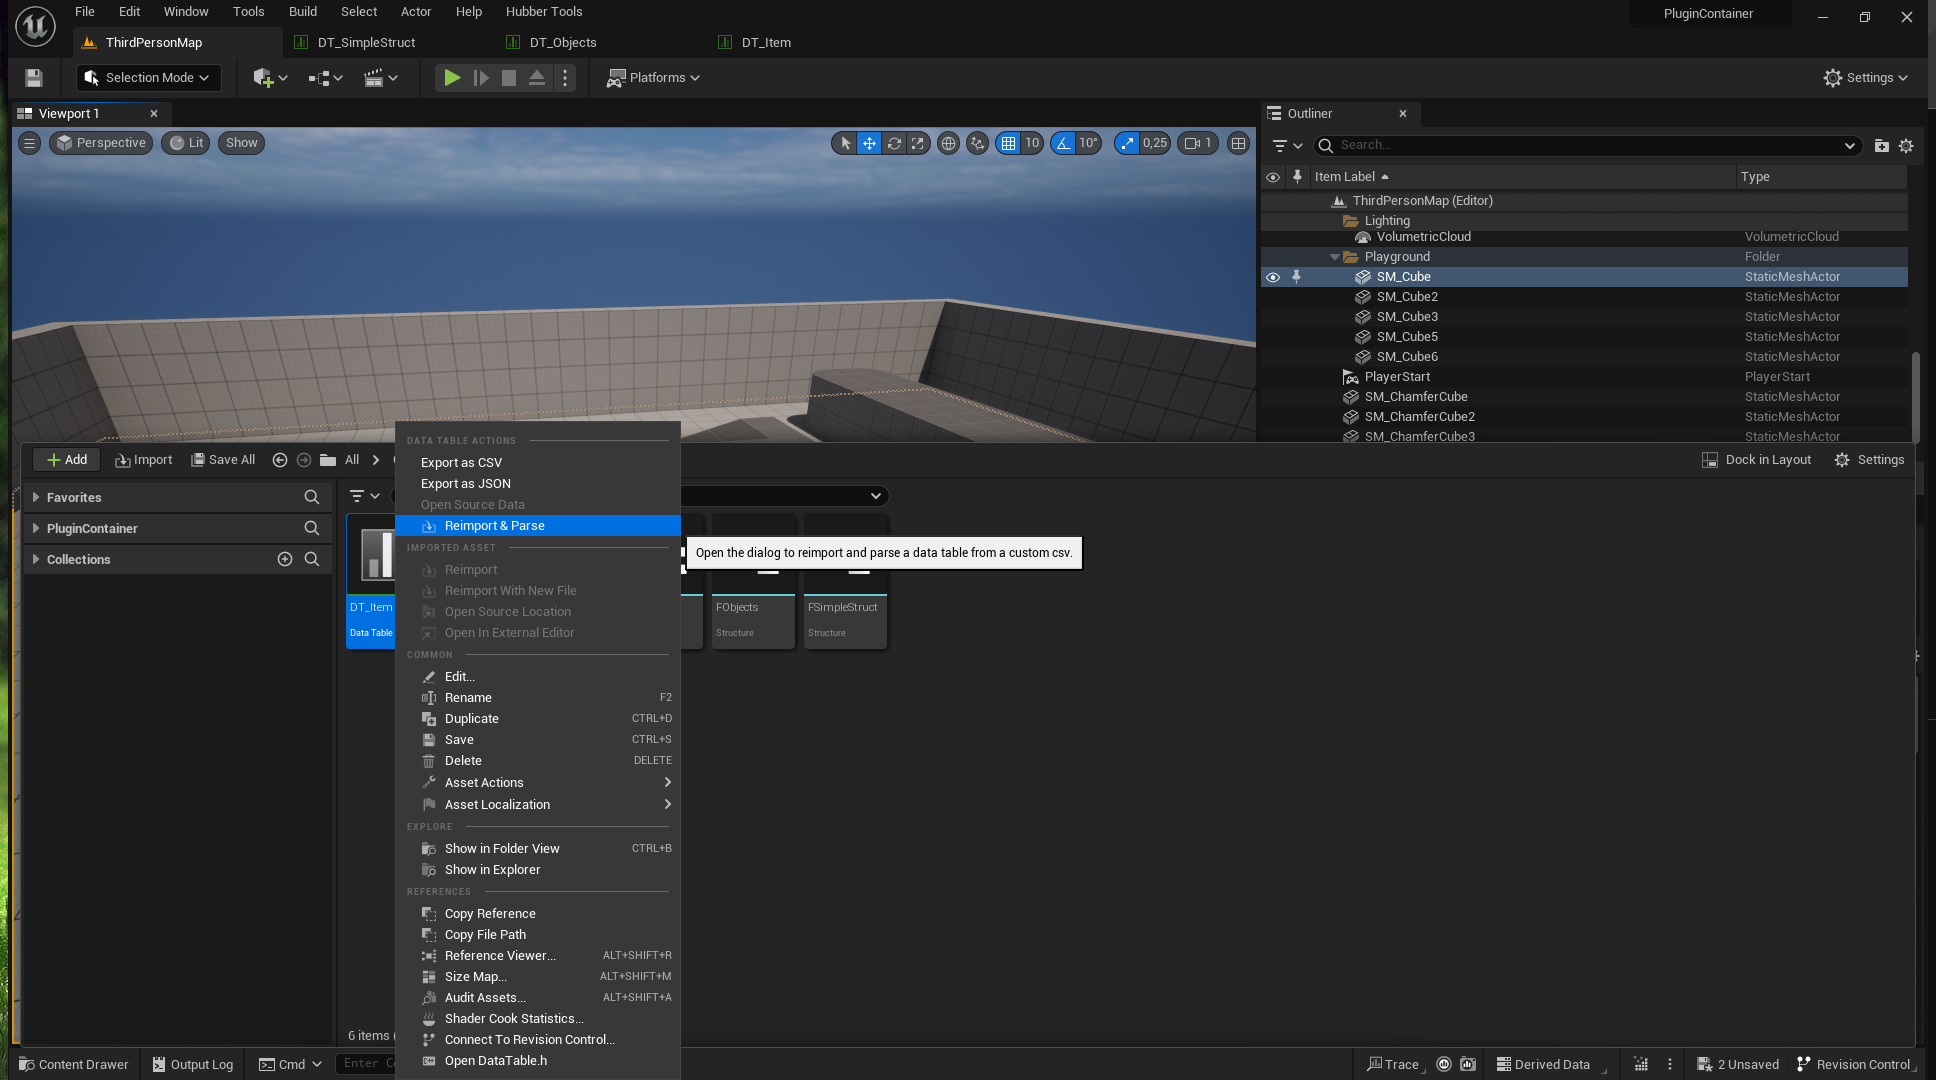
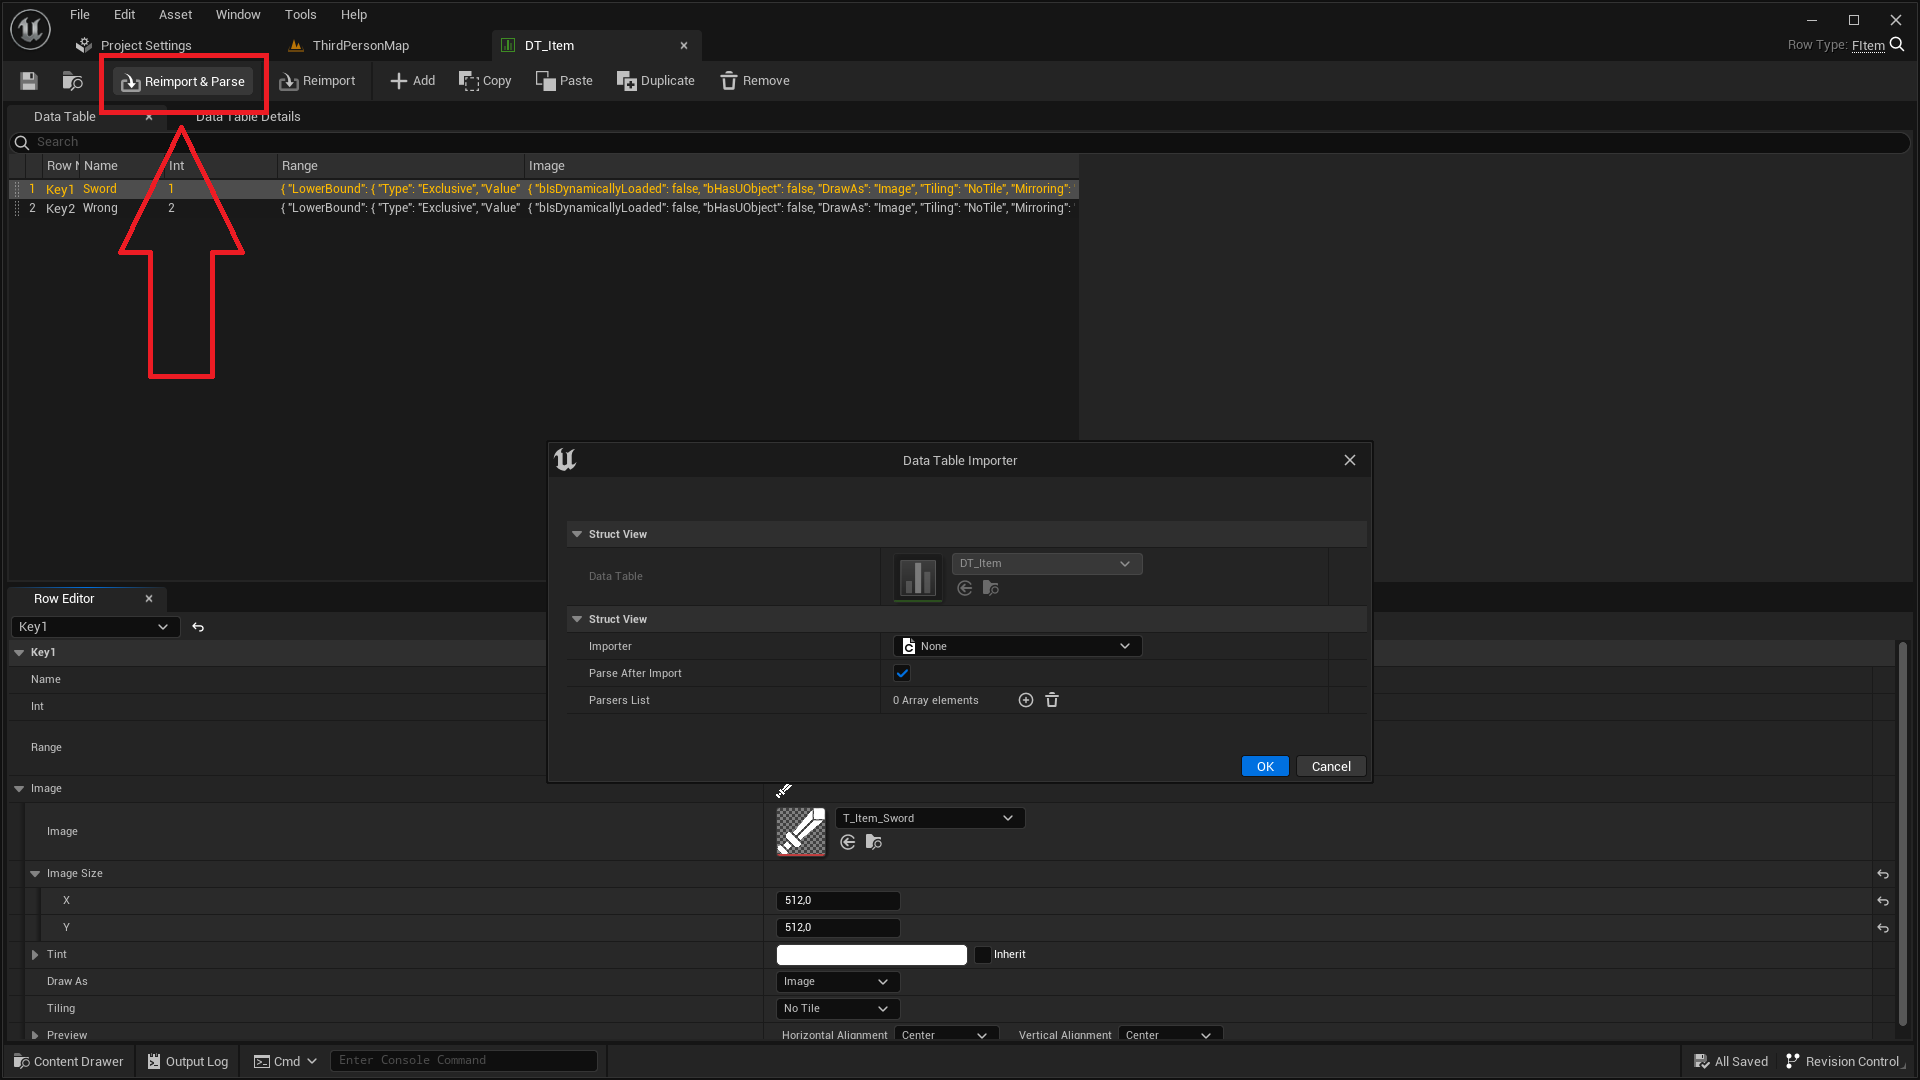
Alternatively, you can open the import dialog directly inside the data table itself.
Import Dialog
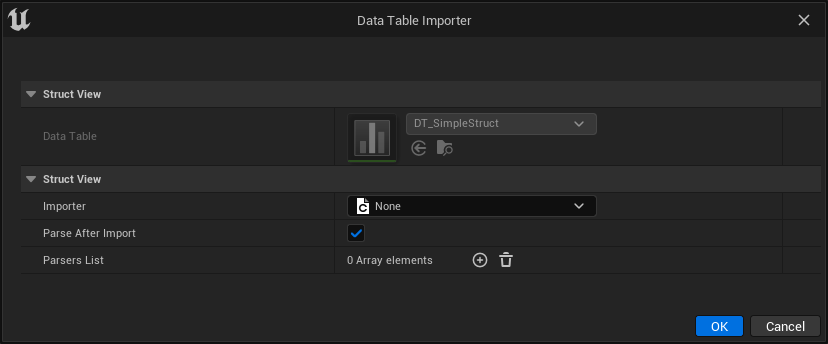
Whenever you need to reimport the data table, you must use the Import Dialog window. Settings are saved for each Data Table whenever you modify it, and the dialog is opened with the data already filled. You can also edit this data from the plugin settings inside the Project Settings window.
Importer
Choose a class to define the import process; you can create your custom import class (Create Importers).
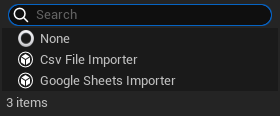
Currently, there are two importers included in the plugin:
- Google Sheets Importer: Import directly from a Google Sheets document (refer to Google Sheets API for importing a private Sheets file).

- Csv File Importer: Choose a file in your filesystem to import the table.

Parsers List
After the import, the CSV passes through a list of parsers to modify data or verify data integrity. You can also define your Parser (see Create Parser to define a custom parser).

You can disable the parser process by setting "ParseAfterImport" to false.
If the ParsersList is empty and "ParseAfterImport" is true, the "DefaultParsersList" inside the plugin settings is used.
The built-in parser inside the plugin is the CsvStructParser; you can find out what it can do here.
Settings Page
Locate the settings page in the Editor section of the Project Settings.
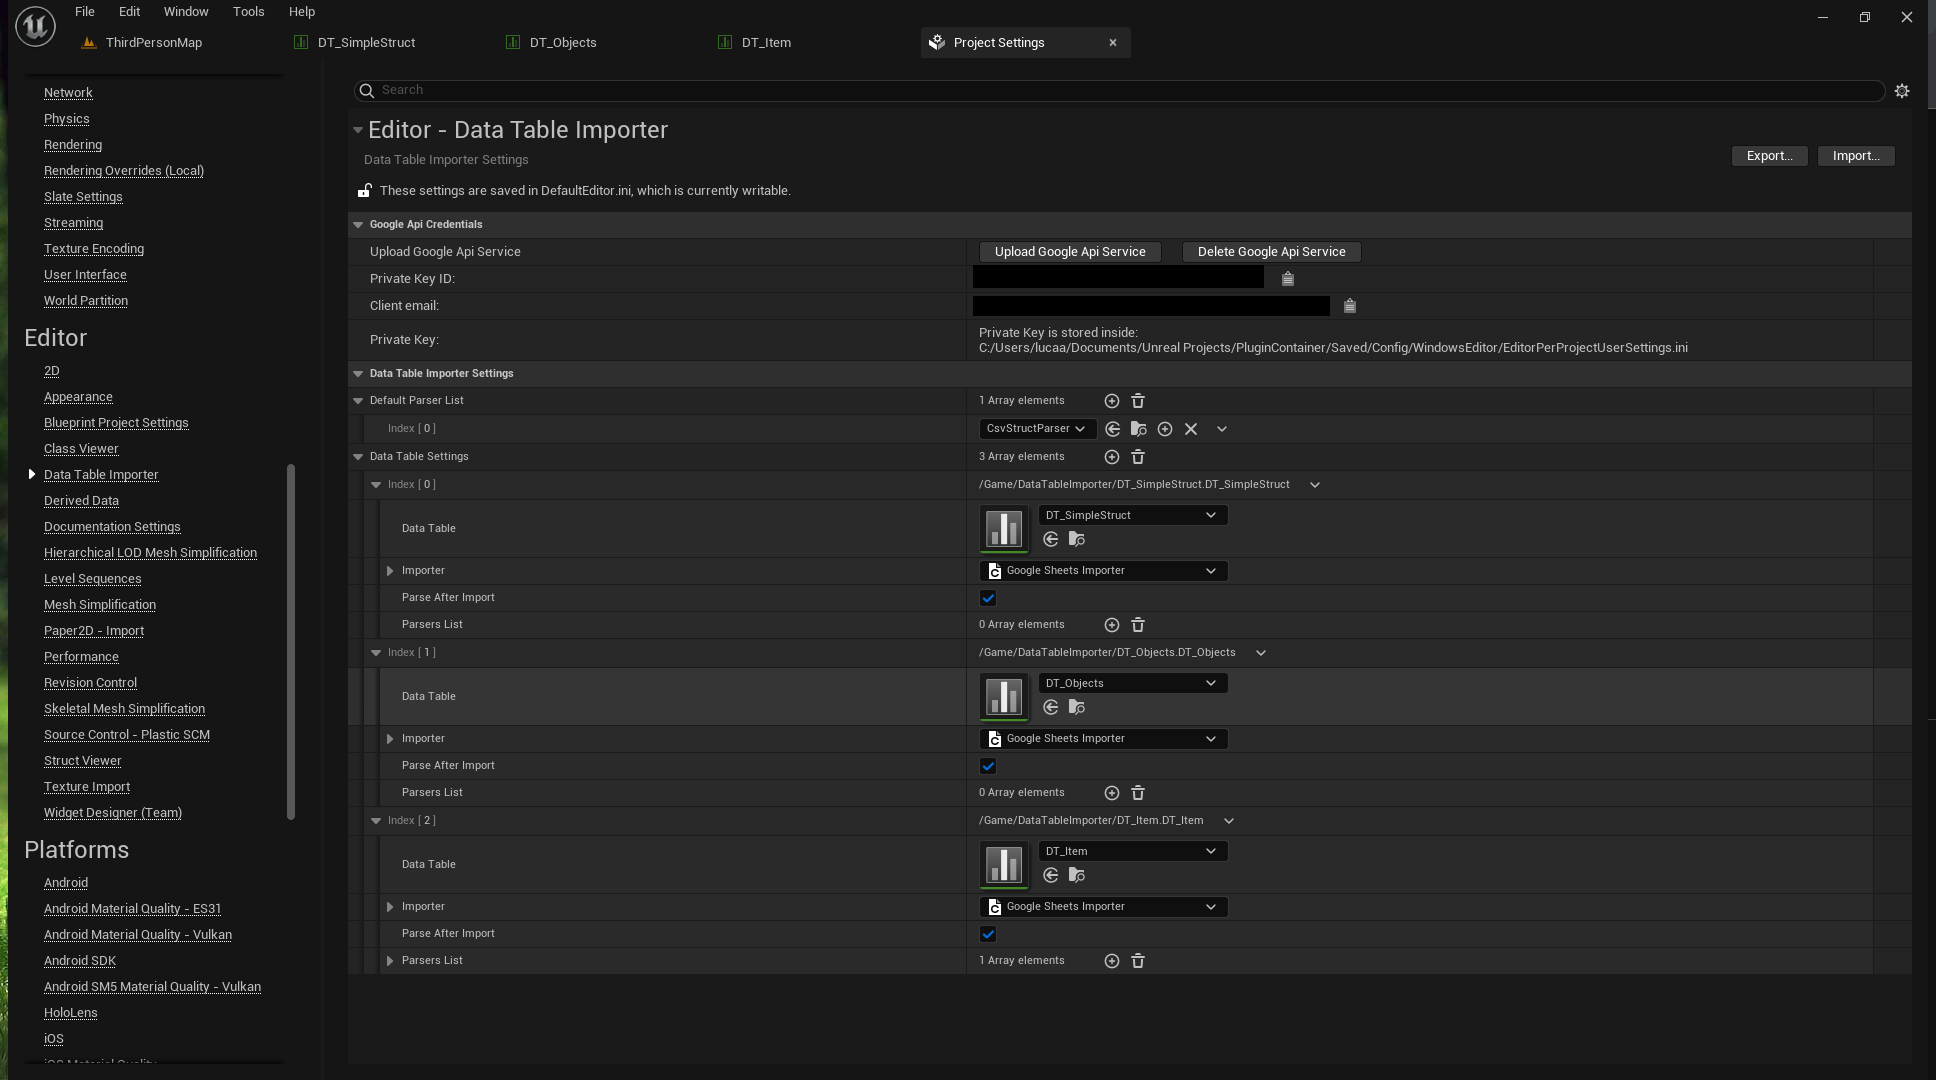
Here, you can:
- Add or modify the import and parse settings for a Data Table
- Define the DefaultParsersList
- Update or delete the Service Account for Google API (refer to Google Sheets API for importing a private Sheets file).